Sunday, June 30, 2013

The Harlequin Shade


French Flair

I found these lamp shades online  for a reasonable price. They have a fabric feel to them on the outside harlequin shade.I purchased them from Distination Lighting for around 14.00. Not a bad price for a little French Flair.

The Boxwood Wreath .What your wreath didnt tell you.

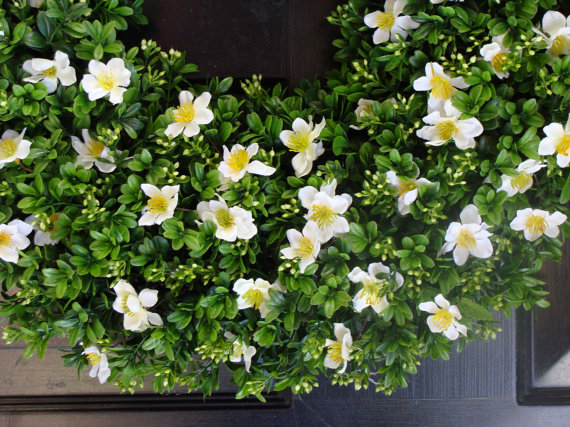
I just love those boxwood wreaths and their simple beauty. You think that you can just decorate them with pretty bows and place them so perfectly on your front door changing the color year round. Boxwood makes great wreaths since their needles do not fall to the floor .
 
décor steals

                                                                                 
James Farmer

                                                                                                                 
You  take them out of the package and loving  how beautiful , green and plush it is. You hang them outside on the door so all your neighbors and everyone driving by can see how beautiful it makes your door look

an then one day you walk outside


with a look of  aaarrrrgh  and uggggg and maybe a little of ooooooo
 mold
 
and dried up leaves and some more mold
 
and you lift it up and find more mold on your freshly painted door
 
This wreath was placed outside from December until July. It didn't show signs of mold until April. My personal opinion is that they should be okay for the winter months but when Jack Frost leaves take them inside. It looked beautiful January , February and March. Then I started noticing mold. If placed outside the dyes and mold could also  stain your door. These are recommended to be used out
INSIDE by manufacturers.
 
 .
Preserved Boxwood Wreaths need a spritz of water about once a month and they shouldn't be placed in direct sunlight because this will cause their leaves to turn brown. These wreaths are usually dyed to give them that beautiful green color and when the elements like humidity, rain, and dew gets on the leaves  moisture builds up and they mold and that green dye will end up on the door.
 
 The 3 worst enemies of preserved florals are direct sunlight, temperature extremes and humidity. Foliages will naturally  fade over time, but many people appreciate the subtle muting of colors and natural patina that time gives to florals. Dust that naturally accumulates on your arrangement can be removed with gentle rinsing, shake excess moisture and allow to air dry before re-displaying.  do not place it in direct sunlight, strong florescent or ultra violet light  and keep it out of excessive humidity. Fading may occur even  in ideal environments which often adds to the character and  beauty of your artwork. Preserved flowers and foliage contain internal dyes that could bleed under hot/freezing with high humidity conditions. Placing our indoor wreaths under covered porch in arid non-freezing conditions has been experimented by many individuals with great success , but these are designed for indoor use.          
   If you plan to store your wreath until the next season, please remember that prolonged exposure to high humidity will accelerate color bleeding. During periods of high humidity, the worst possible way to store drieds is in a closed box on  the basement floor. Elevate your storage area as much as possible and leave the box open whenever relative humidity is above 60%. Be sure to put a few moth balls, inside the carton to aid our built in pest control in keeping hunger bugs away .  
Depending on your environment most will last from 2-5 years, provided that they are kept properly maintained . We recommend that you keep wreaths of direct sun-light,  indoors, and away from humid conditions. We also recommend that you keep the dust from accumulating onto the wreath. You may do this gently rinse , mild shake excess moisture and allow to air dry before re-display or storage.  
 
There is a scent with product . Unfortunately for those whom like the scent it fades over a couple weeks as it cures . A few people have put wreath in warm dry place to speed curing and loss of scent.  . For those whom want to prolong the scent , re-hydration and humidity slows curing and prolongs the scent . Care again must be taken to watch for over hydration or humidity that will increase chances of bleeding or mold.  
The colors will develop a nice patina as they age . Most colors will become brighter when exposed to light . Our colors tend to far outlast the natural chlorophyll of the leaves thus they , when they first arrive , could be much darker than what is pictured . An indicator is that the color will become same shade or slightly lighter than the underside of the leaf as that it contains less chlorophyll . An example is visualizing holding a piece of red rock candy over a green leaf as compared to a gold leaf ( fully bleached ). The red will look dull and sort of maroon . Now hold it over a gold leaf and the red looks quite bright . Basil, purple and olive could appear much darker when first delivered . Better to picture the color they will turn in a couple weeks rather than have a customer disappointed later when color goes lighter than picture . Direct sun will lighten product quicker , but remove from direct sun when it reaches the desired shade .  As light bleaches the natural green out of a plant  ,like grass clippings or wheat , turning gold making several of our colors more true to pictures.  
source-Henderson Wreaths
 
etsy
 
etsy


Friday, June 28, 2013

Health and the Doctor

 
Monthly starting July 10. We will have a Board Certified Family Practice Physician posting on different health related topics.

Chicken and Dumplings

I remember when my daughter was 3 her grandma came to visit us from out of state. While  Grandma Dorothy was there she made my daughter some Chicken and Dumplin soup out of the can. My daughter  turned around and looked at her grandma and said 'Grandma Dumplin". From that day on and 12 years later she still holds the name "Grandma Dumplin" to my children and she was no longer just "Grandma".

I grew up on this chicken and dumpling recipe that my mom makes and I still make it today . The only difference is that when I was a kid I got to eat them and now I save my bowl for the kids because they just cant get enough. I will double up on the recipe and cook them in a big pot and freeze them in quart ziplocs. I will take them out of the freezer and a little water to the saucepan when warming them up..


Chicken and Dumplings

Chicken

Boil a whole chicken in a stock pot covered with water. I usually boil legs and thighs so I wont  have very many bones to pick out of the broth. . you can use  either.
add 1/4 poultry seasoning to the broth
add 1 teaspoon salt ( add more to taste at the end)
Boil covered until the chicken is done and makes a good broth.

Dumplings

1 1/2 cups flour
1 tsp salt
3 tablespoon shortening
1 egg
5 tablespoons water


Add 1/2 cup milk to the pot of broth at the end . stir

Directions
Work flour salt and shortening together until mixture is like coarse meal. Beat eggs and water together and add to flour mixture . mixing well. Divide into two portions. Roll portions very thin  and cut into narrow strips, then cut those strips into short pieces. Drop into boiling broth. Simmer for a few minutes, add the deboned chicken.  then add the 1/2 cup milk. Heat well but do not allow to boil. Black pepper may be added if desired.


Friday Musings

my dream tub

One of my favorite sayings is, "If it is to be, it's up to me."


First learn to say No
Block time on your calendar for a stress-reliever day on a regular basis.
     Here's my favorite prescription for stress relief. A bubble bath. Grab your favorite book , turn on some music and lock yourself in the bathroom. Fill the tub with warm water and make lots of bubbles. While the tub is filling light up some candles lay in the water and close your eyes.
Philippians 4:8 . Finally, brothers and sisters, whatever is true, whatever is noble, whatever is right, whatever is pure, whatever is lovely, whatever is admirable—if anything is excellent or praiseworthy—think about such things. Fill your head full of wonderful thoughts.
     Grab some of your favorite lotions, moisturizers,  after body splashes and wrap yourself in your favorite towel , favorite night clothes and plop into bed. Grab lots of pillows and lay them all behind you and prop your feet up and feel like a princess. Grab your favorite book and drift off to dreamland.
     Your a princess you deserve it and when you wake up the next morning you will feel like a whole new person.

 Lavender: relaxant, steadying influence on the nerves.

Lavender Candles


Thursday, June 27, 2013

Laduree


Ladurée (French pronunciation: ​[la.dy.ʁe]) is a maker of luxury cakes and pastries. It is known as the inventor of the double-decker macaroon, fifteen thousand of which are sold every day. They are still
one of the best known makers of macaroonss in the world.


Have you heard of this place? This is the store in Paris. The color scheme is so beautiful. I love the floors, the wall color and the light fixtures.


I wonder if they melt in your mouth?
I wonder if each macaroon has a different flavor?


Do they taste nutty?
 
Do they taste sweet? Oh and those pretty boxes they come in. sigh. I want to taste every one in this box and who cares about calories? Right?


If you are unable to visit one of the beautiful shops you could always grab this cookbook off Amazon and make them
.http://www.amazon.com/Laduree-Sweet-Recipes-Philippe-Andrieu/dp/281230443X/ref=sr_1_sc_1?ie=UTF8&qid=1372386092&sr=8-1-spell&keywords=ludaree

But would they taste the same or be as pretty?

I ordered this print off Etsy to put in my "Blue Room". I am thinking that it would look really pretty in a simple gold frame....... or maybe a black frame. She has different sizes of this print available.
 
Click the link above to purchase the print
 
so now I can look and still wonder if they are nutty, sweet, and see all those pretty colors and yummy flavors.
and dream of Laduree.............
and  Paris..............

Wednesday, June 26, 2013

Crown Molding and Silk Striped Curtains

Crown Molding and Silk Striped Curtains


This is one of my favorite rooms .Check out that crown molding. I love how the back of the chair has a blue stripe on it to match the striped curtains.

     You can achieve this over the top crown look from Polyurethane trim. Home Depot carries a lot of different styles. Polyurethane crown molding is a lot easier to work with than wood because it is a lot lighter and it does not split when you are cutting it. The only issue is if you plan on  buying 6-8 inch crown which is a pretty common size for this type of trim you need a large miter saw to cut the corners with. A lot of this crown will come with corner blocks and this will allow you to be able to do straight cuts. You can use a sharp hacksaw or coping saw to cut the trim with and do just straight cuts so you will not need a miter saw.

     I do not like joining crown molding in the center because I have to glue them first to get the  perfect joint and sometimes the pieces are not molded the same. To solve the problem what you can do is buy the relay pieces that will go in between the two pieces of crown . This will eliminate the need to try and fit 2 pieces of crown together. I will also use focal blocks to go between my 2 pieces of crown . You have to make sure that if you choose the focal blocks they cannot have an edge on them. The edge of the crown has to be able to buck up right next to the crown and it also has to be the same height as the crown molding . If you do not do this you will have the end of the crown molding sticking out away from the focal block.

     I purchased some fake silk curtains from overstock.com .They are really nice and lined. They have so many beautiful ones that you can choose from and you don't have to pay the price for real silk ones.


They have so many sizes and colors to choose from . If you sign up for their O-mail they will start sending you coupons. Read the reviews of the curtains because I believe some of the people said the blue stripe in these curtains didn't look as blue as the picture.

     I do not know the real color that was used in this picture but it looks a lot like the color I used in my "Blue Room". I used Benjamin Moore Woodlawn Blue. I think it is just the right shade of blue.

http://www.benjaminmoore.com/en-us/paint-color/woodlawnblue

Click the link above to see Woodlawn Blue
I do wish all the magazines would include paint colors and fabric swatches. In a dream world .

My favorite cabinet finish

What a beautiful cabinet. One of these days I am gonna tackle that finish

Tuesday, June 25, 2013

Cabinet Before/After


 My dad built this honey cabinet years ago and I wanted to redo it so it would match my kitchen.

 This is the before Picture. The cabinet was plain and painted white. I always keep sugar , flour and baking items in it.


This is the After picture

After Photo ( sorry for the mess . We are remodeling. Keeping it real. )I glued appliques, added new hardware and an antique knob


after
 
added  some décor on top
 
The back of the cabinet shows where I placed in the kitchen so I decided to build something to decorate it. I built a plaque
 
Now the plaque hangs on the back of the cabinet in the kitchen
 
How I achieved the Look.
The Cabinet- I painted 2 coats of Annie Sloan Chalk Paint in Provence
I applied Annie Sloan clear wax and then lightly applied Annie Sloan dark wax allover in various spots  with a cheesecloth
 I painted the top trim gold using liquid leaf ( this dries pretty quickly so brush along at a faster pace. You will usually need mineral spirits to clean the brush up)
 
Visit me again and I will tell you how I built the plaque!

Monday, June 24, 2013

A Chandelier with bling

Bling Bling
I took just a regular chandelier and added some bling. I purchased the bling from a discount store around the Christmas season. Yep they are Christmas ornaments but are a lot cheaper than buying the pieces individually online. They usually come in packs of different sizes. These were 9.99 for 4 ornaments. You also see Christmas garland which I also found at a discount store. Gotta love bling.
 

Roe Deer Horns

 
I love decorating with roe deer horns . Here is a few I hung above the oak wall.


Blackberry Cobbler 2


Filling

7 cups Fresh Blackberries
1 1/2 cups Sugar
1 tablespoon Lemon Juice
2 Tablespoons Cornstarch

Topping:

3 cups All Purpose Flour
1 1/2 cups sugar
3 teaspoons Baking Powder
1 1/2 teaspoons salt
1 1/4 cups Butter, cold and cut into cubes
1 1/2 cups boiling water.

Turbinado Sugar, (or sugar in the raw)

Preheat oven to 425

In a large bowl, combine together the blackberries, sugar, lemon juice and cornstarch. Set the bowl aside to allow the berries to macerate in the sugar and release some of their juices, about 10 minutes.

 For the topping, in a large bowl add the flour, sugar, baking powder, and salt. Using a whisk, mix the ingredients together to distribute them evenly within the flour. Then put the flour mixture into a food processor bowl, add the butter to the food processor and pulse the mixture together until looks like coarse crumbs with the small pea sized pieces of butter. Place the mixture back in the bowl and keep refrigerated until ready to use.

Place the blackberries in a baking dish, making sure to get all the collected juices. Bake the berries in the oven for 10 minutes. Then remove the baking dish and set aside while you finish the topping to the prepared topping mixture, add the boiling water. Mix together until it is all incorporated. Then drop spoonfuls of the batter over the blackberries. It will spread quite a bit when it bakes. Sprinkle the top of the batter with turbinado sugar and continue to bake for an additional 25-30 monutes, or until the topping is cooked through and golden brown.

Blackberry Cobbler

Blackberry Cobbler

I went to my local home improvement store a few years ago and they had blackberry plants for 2.00 so I grabbed about 15 of them and planted them in my garden spot. They grew and grew and before I knew it they were making runners all  over the yard. I gave some to my dad and left brain has been running over them with the lawn mower. I want to share a blackberry cobbler recipe I made with them the other day .


place 5 cups blackberries in a 9x9x2 inch pan
 some of these  looked like they were in the refrigerator longer than they should have . They were turning reddish.
 
 
 Mix together
2 Tbsp flour
3/4 cup sugar
5 cups blackberries
 
 
 Carefully stir the flour sugar mixture in with the blackberries
 
 Next , make a blackberry topping
1 cup flour
1 cup sugar
1 tsp baking powder
1 egg beaten
1 stick unsalted butter , melted
sprinkle blackberries with flour and sugar mixture. Drizzle butter evenly over crumble topping
.
 
 
 Bake at 375 degrees for 45 minutes
Good with vanilla ice cream!
 
This cobbler is Yum but it is sweet. You can cut back on the sugar if it is your desire.

Strawberry Pie


Gotta Love summertime and all the fresh fruit coming out of the garden. My strawberries didn't come out of my garden , unfortunately, because they all died because of the 102 degree summer we had a few summers ago. I watered, I tried , I begged them to stay alive but they didn't listen. Here is a simple strawberry pie recipe I made .


1 9" pie shell, baked and cooled
1 quart strawberries, washed and capped (you can leave them whole or slice them, whatever you prefer)
1 cup sugar
1 cup water
3 Tbs. cornstarch
1 (3oz.) box of strawberry gelatin (Jello)
 
 
In a saucepan over medium heat, mix the sugar, water and cornstarch.  Stir until it just boils and turns clear and thickens.   Add the strawberry gelatin to the mixture and cook for about a minute stirring constantly and making sure it's smooth.  Remove from heat and allow to cool.
 
Arrange the strawberries in the baked and cooled pie shell. I cut mine in half or you could leave them whole.
 
 Carefully pour the gelatin mixture over the entire pie. .  Place in the refrigerator and chill for at least a few hours. 

Slice and serve with whipped cream or cool whip
You can also cut the sugar back to 1/2 cup and use sugar free Jello to cut back on calories and sugar

Scissors


I spotted these large scissors on an online website and fell in love with their large scale look and color. They now hang in my kitchen/living room .

Monday, June 17, 2013

My Pantry


I chose to do the pantry in Oak and not Poplar because oak is a harder wood and I was going be putting quite a bit of junk on the shelves.  Poplar will work just fine but I like to push myself a little and I wanted a stained oak pantry. Yes,   Poplar is easier to work with because if you mess up on screwing in the nails you can easily sand,  putty and paint . Oak is  a lot harder to hide the mistakes. You can put wood putty on your mistakes and stain but you can usually see the mistakes after you try and stain. If it doesn't bother you than don't worry about those extra holes.


 We cut the 1x2s and drilled the predrilled and countersunk the holes where the studs were on the wall


I cut some oak baseboards for the closet
 
we marked the studs first and stuck a straight pin in the drywall and nailed to make sure we were going to be hammering into a stud.i used painters tape to keep the boards on the wall. Next we marked the holes in the 1x2s then drilled with a drill press and countersank the holes using a drill press. .we made the holes before we put stained and wipe on poly on because I didn't want the finish scratched and you always have to sand after making holes.you can see the screws in the corners. we had to go in at an angle to get away from screwing in the ends of the oak boards. If you pop a nail with a nailgun or screw at the end of wood it will split.I will not screw or nail any closer than 1 inch from the end of a board. I also glued a piece of trim over the screws and you can see in the picture there are no screw heads. This allows for a more finished look. (I know what you are thinking "You cant even see that with the stuff piled onto the shelves") I just couldn't leave all those screws showing
 we cut the shelves for the pantry out of 3/4 inch plywood and also stained with a dark walnut and wipe on poly finish. do not use anything smaller than 3/4 inch because when you weigh down the shelves they will sag.

      I always use SPAX screws . I love SPAX! I have a house that has some really dried out old boards in the walls and I drilled the 1x2s on the wall and the regular screws broke a few times. and then I discovered SPAX.


In this photo I glued a piece of decorative shelf front on the front of the 3/4 inch plywood  to cover up the rough end of the shelf. Next, I glued another piece on the top end of the shelf and bucked it to the front piece so it will form a ledge . This ledge will prevent things on the shelf from falling off and damaging anything below and gives it a more trimmed out look.


I applied a natural minwax stain on the drawer and about 7 coats of wipe on poly sanding between each coat . I was trying to make the drawers shiny and smooth like a guitar. I also added some trim on the drawers.

In this photo I had my cabinet maker build me a spice cabinet


I put a door on the spice cabinet


I purchased these corbels off ebay for around 18.00 a piece. If you are in need of the corbels check ebay first it will save you a lot of money. I also put up crown molding . This was a closet and I took down the door and trimmed it out on the inside with decorative trim so it stays open. I will probably add a curtain later and swing the curtain to the right so I can easily get things in and out. There is a door on the left that swings in front of this so I could not handle closing one door to open another .

I used Loctite glue to glue the front pieces and top pieces on the shelves to make the ledge. I also used Loctite all purpose glue to glue the corbels on the wall . I always put superglue on anything heavy that I am gluing with Loctite so it will hold the corbels in place until the glue dries. On the 1x2s that hold up the shelves I also went back and glued a piece of decorative trim over all the screws that I countersank to hide everything. Its an extra cost but it makes the look flawless.

I did all the refinishing work myself with Dark Walnut stain and Wipe-On Poly.
When applying the Wipe On Poly use those lens cleaning pads you buy in the package you will have less lint coming off. I usually apply 5 coats . Always run a fine sanding pad down it one or two times between coats. I never run the sanding sponge until after the 3rd coat  because it will take the stain off. Always stay away from nailing or screwing at the end of oak as it will split. I usually never screw or nail from the end any closer than 1 inch. I had the cabinet maker make the spice cabinet and cut out the shelves.


Friday, June 14, 2013

A Decor House Tour

 
These are just a few things hanging around my house.


I installed this crown molding and hand built all the blocks .


cartouches in the "Blue Room" I love this Pottery Barn color "Woodlawn Blue" I think I am going to use it in the bathroom whenever I finish tiling in 2014 I hope.


This opens up to store keys and I have never even put a key in it 


 Colby the Cow. Doesn't he have a sweet face. you can find him on Wayfair in different sizes
 
 I looked everywhere for a pretty sunburst mirror and after 3 years I found it.


  I found this for 75% off at a local shop . I cant wait to hang it to cover the hole in the ceiling where I swore there was a light fixture previously installed


I have a cookbook addiction. if you need a recipe just email me. I promise you I have it


and we are still under a remodel that seems like it will never end. Have I told you that if you rip out all of your house yourself except for 1 toilet it will take you forever to put it all back together?